
Uncategorized
DIY Weekend Project: How to Create a Stunning Industrial-Style Rain Chain
Jun
Tired of the plain, boring downspout on the corner of your house? There’s a simple, elegant, and surprisingly easy DIY project that can transform that eyesore into a captivating water feature: a rain chain. Originating in Japan, rain chains guide rainwater from your gutters to the ground, creating a beautiful cascading waterfall effect and a soothing sound.
Using a durable steel chain, you can create a modern, industrial-style rain chain that is not only functional but also a striking piece of outdoor art. This project is perfect for a weekend and requires minimal tools, making it accessible even for beginner DIY enthusiasts. Let’s get started.
Why Choose a Steel Chain?
For this project, the material matters. You need something that can withstand constant exposure to water and weather year-round. A heavy-duty stainless steel or galvanized steel coil chain is the perfect choice. Stainless steel offers superior rust and corrosion resistance for a sleek, polished look that lasts. Galvanized steel is coated in zinc for excellent durability and provides a more rustic, weathered aesthetic over time. Both are strong enough to handle heavy water flow and won’t degrade like rope or other materials.
Materials You’ll Need:
- Steel Chain: A length of 1/8 inch to 1/4 inch stainless or galvanized steel coil chain. Measure the distance from your gutter to the ground where you want the chain to end and add an extra foot.
- Gutter Outlet/Adapter: This piece fits into the hole in your gutter and provides a bar or hook to hang the chain from. You can find these at most hardware stores or online.
- Basin or Anchor Stone: A large decorative basin, a collection of river rocks, or a heavy anchor stone for the bottom of the chain to prevent it from swinging in the wind.
- Pliers & Bolt Cutters: For handling and cutting the heavy-gauge chain.
- Ladder: To safely reach your gutters.
- Safety Goggles and Gloves: Essential for protecting yourself while working.
Step-by-Step Installation Guide
Step 1: Prepare the Gutter Safely position your ladder. First, you’ll need to remove the existing downspout. It is usually attached with a few screws. Once removed, clean the area around the gutter hole. Install your gutter outlet or adapter according to its instructions; most simply slide into place.
Step 2: Measure and Cut Your Chain Unroll your steel chain. Measure the distance from the gutter adapter to just above the ground or the top of your basin. Put on your safety goggles and gloves. Using bolt cutters, carefully cut the chain to your required length. It’s better to cut it slightly longer; you can always remove links later if needed.
Step 3: Hang the Chain Climb the ladder and securely hang the top link of your steel chain from the hook or bar on your newly installed gutter adapter. Make sure the connection is strong and centered in the hole to ensure water flows directly down the chain.
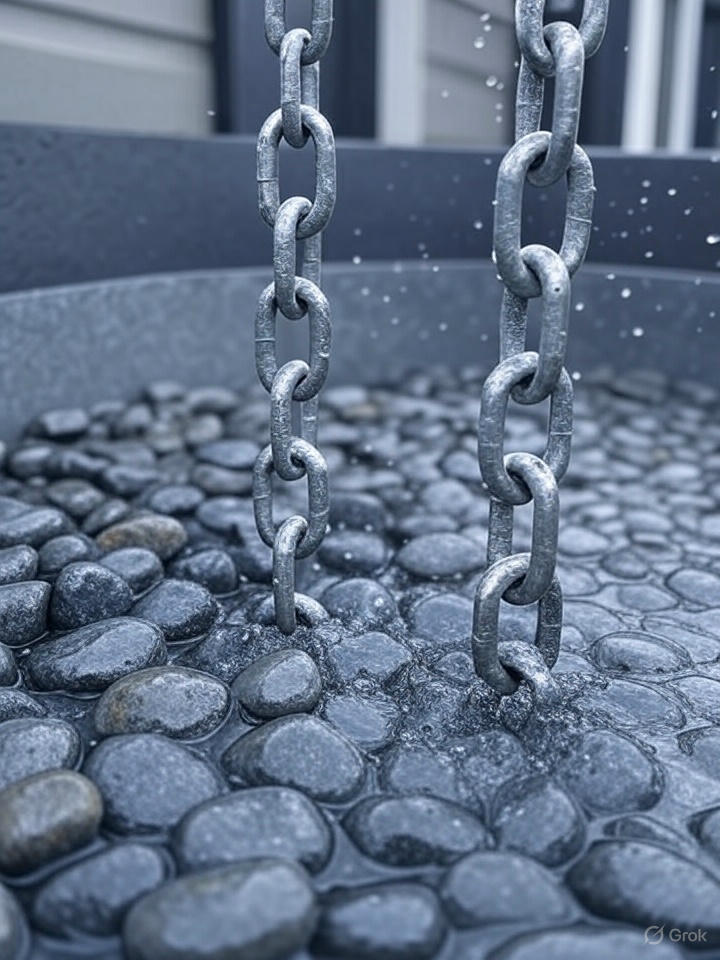
Step 4: Anchor the Bottom Let the chain hang naturally. To prevent it from swaying excessively in high winds and splashing water, you need to anchor the bottom. You can either let the end of the chain pool in a large ceramic basin or run it through the hole in a large, drilled anchor stone. This not only secures the chain but also adds a professional, finished look to your installation.
Step 5: Test and Admire Wait for the next rainy day to see your creation in action! Or, if you’re impatient, you can pour a bucket of water into the gutter to test the flow. Watch as the water beautifully trickles down the links, creating a mesmerizing visual and auditory experience.
With just a few hours of work, you’ve upgraded your home’s exterior, adding a touch of functional art that is both durable and beautiful.